Off Grid...Chapter 131
Mike and I have been really busy working and also planning new projects
 Finally I am back to finish our shed story. I am very happy to be able to use a very clean building Finally I am back to finish our shed story. I am very happy to be able to use a very clean building Since the shed door is a little high we decide to build a box step using some of of our leftover wood  First we cut four pressure treated boards down.  Then Mike screws the base together.  And the top boards go on. And now we have an easy step for the doorway.   Next up we have to work on the gaps under the eaves of the shed. We start off by using some old pieces of trim so we can install the J channel. Putting up the old trim.  Mike nailing on the trim.  Mike nailing the J channel.  Now it's time to install the soffit. First we have to cut it down to fit. The soffit comes in ten foot sections. We need to cut it down to about 12 inches for each section. It's a tedious job ") Mike cutting the soffit with snips.  Mike starting to install the soffit.  I cut.  While Mike installs.  Now onto the other side. Mike starts off by installing trim. Then he screws in the J channel.  Then the soffits.  Yay...it's the last soffit to go up.  Before we paint we have to make sure the building is completely sealed. Mike starts filling in any gaps with caulk.  We get that enclosed and now it's time to paint  Of course I have to do the trim work. I start first since it takes me longer. Of course I have to do the trim work. I start first since it takes me longer. Mike starts rolling the side.  And we are done with the wood part of the shed  We really have to something about that hideous metal door and metal building Mike adding a piece of wood to fill in the gap between the back of the truss and the metal building.  Mike installing the fascia.  Now it's the to work on the front metal door. Mike spent a lot of time prepping this. First he sands it. 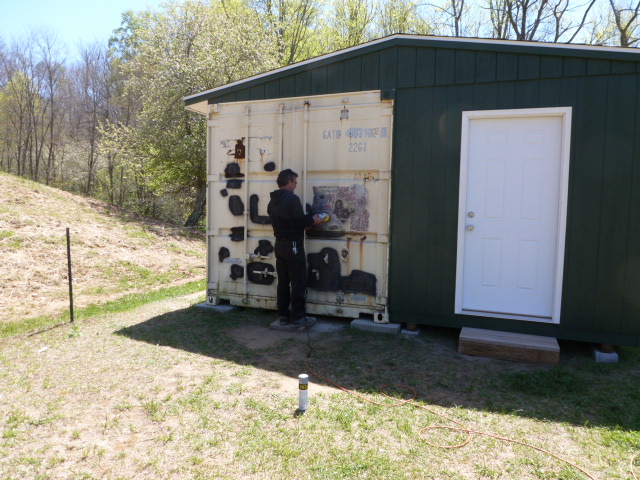 Then fills in the dents with filler.  He lets that dry, sands it down and has to fill it again.  We repeat that process until we think it is smooth enough to paint. Time to paint the door. We are going to use the sprayer this time for a better paint job over the handles and all the nooks and crannies. Mike prepping the spray painter.  And starting to spray.  And he is almost done. Bye bye ugly door  We still have to finish painting the back side of the metal building but for now we are done with the shed We went from this.  To this.  And we are very happy with it. I hope you all enjoyed our shed story. |
Showing posts with label Body Filler. Show all posts
Showing posts with label Body Filler. Show all posts
Tuesday, February 26, 2013
Chapter 131...How To Build A Shed Part 3
Subscribe to:
Posts (Atom)