The time has come to put the shingles on. The morning starts out rainy so Mike and I went to town to pick up more roofing nails. We have a Bostich Nail Gun and found a generic brand of roofing nails that fit our gun:) I love when we get a deal.
BTW, if anyone is having trouble posting to my blog a friend of mine told me what you should do. From Jaxson:)
"Just pick 'anonymous' type your message then I sign my name at the end of it. That way you don't have to go through all the registering on the other choices or use your FB account."
Later that day the skies clear up. Mike and I decide to start the shingles.
Mike starts out by nailing the starter strip on:

After the strip is on we can start with the shingles. We start with the very first row and work our way backwards and to the ridge of the roof. Once we get a few rows on, Mike and I can turn around and work our way up:
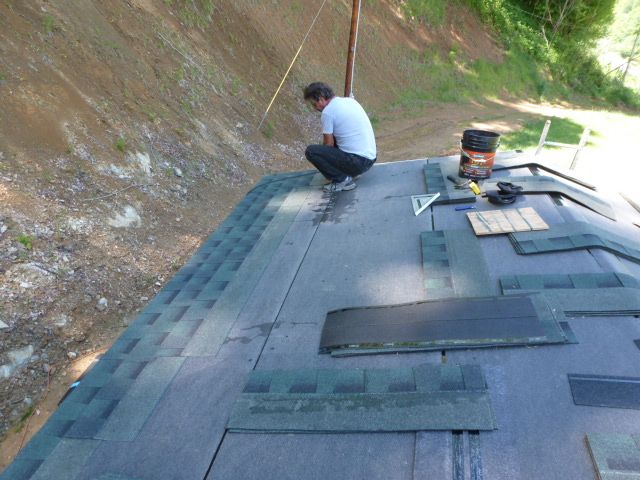
I'm lining up and laying out the shingles for Mike to nail:

Almost to the top of the back side of the roof:

Working on the other side. We work on about 6 rows at a time:

Woo hoo. It only took us 2 1/2 hours to get the back of the roof done:)

Tomorrow is another day and we will start fresh on the front half of the roof.
Mike starts again with the starter strip:

The starter strip is on and we are ready for the shingles:

Mike starts with the first shingles at the far end:

Again...working on about 6 rows at a time and working our way up to the ridge:

The last of the regular rows of shingles. This side took us another 2 1/2 hours. Not bad:

Now for the part that will slow us down. We need to cut shingles down for both sides of the ridge and then we also need to cut the ridge cap pieces. I start cutting the long lengths, which by the way are much easier to cut when they are warmed by the sun:):

Mike nailing on the strips that I cut up:

After the ridge line is done on both sides Mike and I work on cutting the shingles for the ridge caps. I cut the squares out and Mike cuts the angles:

Mike setting the ridge caps lined up:

Our nice cuts for the ridge caps:

Ah....the last shingle going on the roof:

Mike walking the ridge to make sure everything looks good:

Yay...the roof is done and no more high ladder work:)

LOL...Mike told me that we were never doing another roof...that was 3 roofs ago...Hmm!!!
This is the first real mess we made. Usually Mike and I have a very clean work site but not today, lol:

And:

Lucky for us our neighbor started a big burn pile and we can clean up:

We load all the debris on to the trailer and take it to the burn pile next door:

That's how we clean up in the country:)
I hope you all enjoyed this story and I will write again very soon. Have a wonderful week:)
I've learned a lot from this entry. I didn't know what ridge caps meant until I read it here. Do unused pieces of the shingles get put into the burn pile too? If so, I'll bet that's not a very pleasant odor. Does anyone stay around to keep an eye on the burn pile?
ReplyDeleteOnce more, thanks again for sharing your stories with us.
Lily
They do make pre made ridge cap pieces but they are more expensive than making your own.
DeleteThankfully we didn't have a lot of waste. The shingles smoke a lot when they burn...thankfully the fire was a very hot one and they were gone in no time. Yes whoever has a burn going on needs to keep an eye on it as long as there are flames. Once it dies down to embers you can push it all together and leave it. It all depends on the winds and where you have it.
Thank "you" for writing. Sorry it took so long for me to write back.
I was looking at the trees etc... from the pics of y'all on the roof. It is so pretty there! It looks so peaceful. I'm sure there must be traffic on that road since y'all are building a store! (Yeah, I'm quick that way. LOL)
ReplyDeleteI see that, like anything y'all do, there isn't any wasting of time! Looking forward to the next pics!
Kats
DeleteLOL...it is pretty peaceful until a semi goes by. It's a good location for a store:)
Thanks for writing Kats:)
I have finally found your blog and love it. I have missed it. My life is rather sedentary at this time so, this is a wonderful travelogue for me. Thx for all your postings. I read your stuff on CD from end to end.
ReplyDeleteAnnieA
I am very glad you found us. Happy reading:)
DeleteKudos to both of you for perfectly installing all the shingles on the roof! Laying the shingles and nailing them one by one are not easy. You have to make sure that every piece of shingles is laid and nailed well to prevent it from peeling off when extreme wind or storm comes. The durability of the roof depends on how you properly installed the shingles. Well done, Mike and Lisa! ->Edmunds General Contracting, LLC
ReplyDeleteThank you for the compliment.
DeleteI did enjoy not just your story, but your whole blog as well. Great work on putting the shingles on the roof. I really like the finished product. It goes well with the green surroundings. I just hope you did not suffer from back pains from having to bend over for hours.
ReplyDeleteErnestine Wollard @ WestFallRoofing
Thank you. No back pains at all. Thankfully it was a very small roof:)
DeleteI love the roof. We've been looking at land over your way - dying to get things finished up here in middle TN and move on to building our house. Every person we talked to said we'd have to have this CRAZY steep roof because of the snow load. Um, it's east TN, not Alaska. We were getting frustrated thinking we'd need to come up with a new plan for our house. Good to see this and know we don't have to be stuck with a near A-frame! LOL
ReplyDeleteIf we wind up your way we'll definitely be in the store. We plan on putting in a monster size garden and having a lot of livestock, so lots of canned and frozen foods, eggs and meat. :) Of course that's a good five years down the road!
You don't have to get crazy on the roof pitch. A 2/12 would be the minimum. Any roof 2/12 to 4/12 would work. The 4/12 would have a higher pitch but not an A frame.
DeleteLook forward to meeting you...some day:) I would love to have livestock of our own but until we stop remodeling we can't. Good luck to you. Do you can?