Showing posts with label Ridge Cap. Show all posts

Monday, June 10, 2013

Chapter 155...The Shingle Roof


The time has come to put the shingles on.  The morning starts out rainy so Mike and I went to town to pick up more roofing nails.  We have a Bostich Nail Gun and found a generic brand of roofing nails that fit our gun:)  I love when we get a deal.


BTW, if anyone is having trouble posting to my blog a friend of mine told me what you should do.  From Jaxson:)

"Just pick 'anonymous' type your message then I sign my name at the end of it. That way you don't have to go through all the registering on the other choices or use your FB account."


Later that day the skies clear up.  Mike and I decide to start the shingles.


Mike starts out by nailing the starter strip on:


After the strip is on we can start with the shingles.  We start with the very first row and work our way backwards and to the ridge of the roof.  Once we get a few rows on, Mike and I can turn around and work our way up:
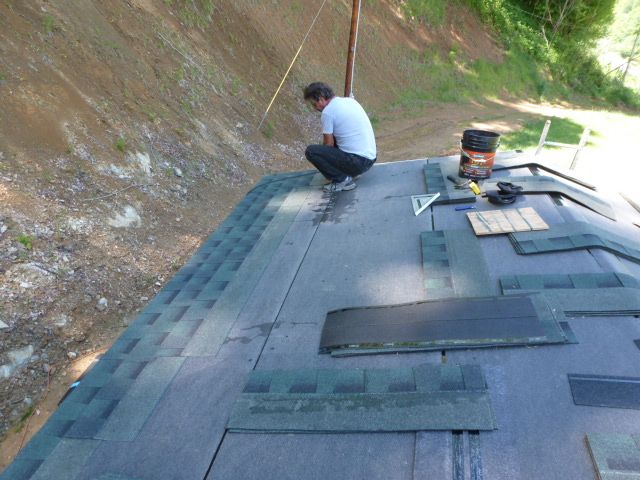


I'm lining up and laying out the shingles for Mike to nail:


Almost to the top of the back side of the roof:


Working on the other side.  We work on about 6 rows at a time:


Woo hoo.  It only took us 2 1/2 hours to get the back of the roof done:)


Tomorrow is another day and we will start fresh on the front half of the roof.


Mike starts again with the starter strip:


The starter strip is on and we are ready for the shingles:


Mike starts with the first shingles at the far end:


Again...working on about 6 rows at a time and working our way up to the ridge:


The last of the regular rows of shingles.  This side took us another 2 1/2 hours.  Not bad:


Now for the part that will slow us down.  We need to cut shingles down for both sides of the ridge and then we also need to cut the ridge cap pieces.  I start cutting the long lengths, which by the way are much easier to cut when they are warmed by the sun:):


Mike nailing on the strips that I cut up:


After the ridge line is done on both sides Mike and I work on cutting the shingles for the ridge caps.  I cut the squares out and Mike cuts the angles:


Mike setting the ridge caps lined up:


Our nice cuts for the ridge caps:


Ah....the last shingle going on the roof:


Mike walking the ridge to make sure everything looks good:


Yay...the roof is done and no more high ladder work:)


LOL...Mike told me that we were never doing another roof...that was 3 roofs ago...Hmm!!!


This is the first real mess we made.  Usually Mike and I have a very clean work site but not today, lol:

And:


Lucky for us our neighbor started a big burn pile and we can clean up:


We load all the debris on to the trailer and take it to the burn pile next door:


That's how we clean up in the country:)


I hope you all enjoyed this story and I will write again very soon.  Have a wonderful week:)

Tuesday, February 26, 2013

Chapter 129...How To Build A Shed Part 2

Off Grid...Chapter 129


It's time for another story with lots of pictures about building our shed. Today I will tell you about the trusses and the roof.

We ordered the trusses and we told the company to 1. bring a smaller truck and 2. call us when they are on their way. Did they do that? Of course not It's a good thing the truss truck showed up when Howard and Ivalee, our cow people, where on their way in. Of course the truck was too big to get in here and on top of that they loaded someone else's much bigger and longer trusses "behind" ours. Anyway, Howard drove up here to tell us. Mike went down with them to see what to do. With Howard and Ivalee's help Mike got the truck unloaded and they all got the trusses onto Howard's truck. They brought them up top and Mike's daughter and I helped them unload the trusses onto the driveway.


OK....now we can start working This is where the tractor comes in handy again.

Mike and I load the trusses onto the tractor bucket.


Then we used the tractor to lift the trusses as high as we can next to the building.

The trusses will span both the new shed and our old metal building. We want to make both buildings look like one. It will also help with the old roof on the metal building and keep it from rusting.

Mike climbs up the tractor arm so he can start pulling the trusses onto the top of the building. This is where the metal building becomes very useful. Mike has someplace to stand and he doesn't have to straddle the trusses


We get all the trusses on top of the building and get them laid out. This is what they look like from inside.


Time to stand them up and get them nailed in.


The first end truss is up and nailed in.


And a few more. Mike stands it up on one side and measures while I hold the other end up and keep it straight.


We preinstall some of the OSB boards to help make the trusses more stable while we are working on them.


And finally we got all of the trusses installed.


Now it's time to get the rest of the OSB sheets onto the roof before we can put the shingles on. Mike stands on the metal building roof and reaches down while I lift up the boards one by one and throw them up to him.


Mike nailing in an OSB board.


Mike using the H clips to make the boards stronger. The trusses were installed every 2 feet. The OSB boards are 4' by 8' and will be installed on the trusses in a staggered pattern to make the roof strong. THe H clips help hold the open areas tight.


Mike working on the front side of the roof.


And we are almost done...well with this part


All of the OSB sheets are on the roof. Now we need to protect it.


We use the tractor again to lift the rolls of Ice and Water Shield. We get it all on the roof and Mike blows off the roof to get it clean before we unroll the Ice and Water Shield.


Mike unrolling it.


Next I help Mike install it. It has a plastic backing that you peel off and then stick it down to the roof. Mike measures the length that we need, we spread it out where it needs to go, roll it halfway back, unroll the plastic cover, and then stick it down together. Mike walks on it to help it adhere to the wood.


We get all of it on the roof. Whew....we just had enough of it left from last year's roofing job But now we don't have the shingles so we have to jump to another job. At least the roof is now protected and we don't have to worry about it.


We decided to install the front door for our new shed. Mike installs the frame.


And the door is on


I know it's looking kind of strange but it will all come together


Yay...we got the shingles. Now it's time to get the bundles on the roof Again we use the tractor.


Mike raises the tractor bucket as far as it will go and then he climbs into the bucket. I get on the roof and help him get the bundles on the roof.

Mike sliding one of the bundles onto the roof.


Once Mike slides the budges on the roof I pick them up and place them along the ridge line so we can start working.


The shingles are up


I slice open the budges and start to lay out a few shingles at a time where we will be working. While I do that, Mike installs the drip edge.


Once the drip edge is installed we can start nailing the shingles on. We get into our routine pretty quick. I lay out the shingle and Mike nails it in. We do about four full rows at a time.


Almost halfway done with the shingles.


Time for the other side. I try my hand at nailing.


Mike is much faster so we go back to our old routine.


We are almost done with the shingles.


After the shingles are done we have to make the ridge cap. We do this by cutting the shingles to cover the ridge. Then they have to be nailed down.


Mike working on the ridge cap and then we are done with the roof


Almost Done


Yay...we kicked butt on the shingles. We did it in under 3 hours


Next we have to get the whole shed closed in.


Mike works on the panels for the peak of the buildings. We use some old T1-11 that we had hanging around


The front peak is closed in.


And the back is done.


Woo hoo. The roof is done. After the shed is complete on the outside I will show you how we made some really awesome and huge shelves for the inside of the shed.


Lisa