Installing The Solar Racks In March.
March 10
It feels good to finally be working unfortunately it has been a rough winter and we have had very few days that we could work outside. This also means that Mike is going stir crazy as he really hates being inside...which means he likes to bug me more, lol.
So onto some work:) Mike has come up with a new and “final” plan for our solar set up. We have learned a lot in the past five years and now we can put that knowledge to good use. We started with our original panels on the roof of the house. We did that because we were trying to move into the house before winter and it was a fast solution. From there we built a nice rack on the side hill next to the house. While those looked really nice, Mike became concerned with the ease of stealing. We don’t have that problem here but you should always be safe rather than sorry. So then we moved the panels to the top of the shipping container and they stayed there for awhile. We thought they would be fairly easy for us to clean and maintain using the tractor or a ladder. Well that didn’t work too well when we had heavy snow.
Now for the final plan. First we are going to change out our old solar panels for newer solar panels that are larger. Now we can have half the amount of panels and a larger system. We are going to install the new solar panel racks on the outer side of the shipping container. They will start at the front of the building and extend past the back of the building. In keeping the panels close to the building Mike won;t have to adjust the size of the wiring.
First we have to prep the ground next to the shipping container. The front side of it is a very narrow area so we will build it up.
Mike adds a couple of posts and a board to hold in the new dirt. Next he uses the tractor to scrape dirt from our yard to fill in the space:


Making the side of the building land a little wider:
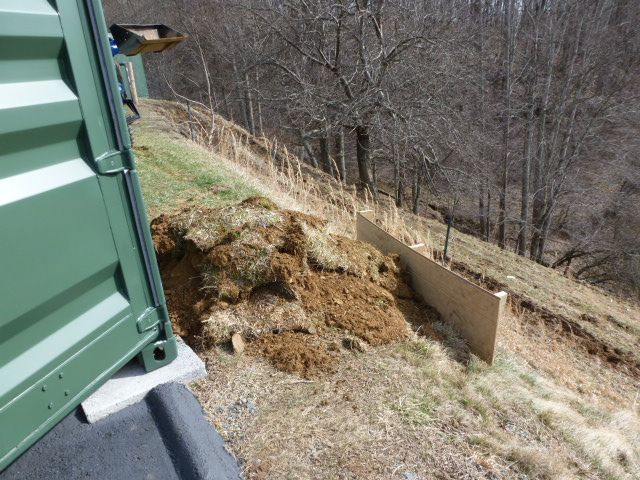

Leveling the land behind the building to add to the side:


Mike on the side of the building where the new solar panels will go:


Mike working by hand to get the hill filled in:


March 12
Now the fun begins, lol. Time to start digging the holes for the new solar panel racks.
We need to dig five holes about 3 feet deep. Then we will out the post in and add the concrete.
Mike digging out the first hole:


And the second hole:


Unfortunately we got the first two holes dug out and then the rain came.
March 14
Thankfully we didn’t have any washouts from all the rain. Now it’s time to make our new hill secure. Mike takes out the posts and the board that was holding the new dirt in place.
Next Mike and I seed the side and top of the new hill. Then we take some of our leftover curlex and staple it across the side of the hill. This should help hold the hill in place:


We also got one more hole dug. Then we add some grass seed and hay. Mike waters the seed for it to germinate and the hay so it won't blow away.


March 15
It’s time to see how we will move the new solar panel racks. They are awkward and heavy for just the two of us but of course Mike and I will get ‘r done.
Using the tractor we are able to get a chain around the pole and lift it:


Then we put the pole on the trailer and Mike measures off the bottom 36 inches that will be in the ground:


He sprays the bottom 36 inches with a rubber coating to protect the pole:


We push the trailer close to the shipping container and then Mike and I push, pull and shove until we get the pole of the solar panel mount into the first hole:


Now it’s tome to mix the quikrete. I mixed it in the bucket and Mike shovels it onto the first hole:


Me mixing some more:


We put in 320 pounds of concrete on the first hole. After that cures a bit, Mike puts some weed cloth down uses the hand truck and a bucket to bring over some landscape rocks:


Adding the rock:


Next Mike adds a board for the border. We will have a rock garden underneath the new solar panels to keep everything nice and neat.
Mike finishes the first solar rack by sanding off any rust and then painting it for protection:


We wrap up the other racks and call it a day.
March 16
A new day and another rack to put in the ground.
First we have to unwrap the racks:


We get the second one on the trailer:


Mike paints the bottom 36 inches and we push the trailer and pole closer to the building:


We get that pole into the ground and start mixing concrete again:


We get it lined up and level with the first pole and use the tractor to hold it in place until the concrete dries:


Mike sands that mount and paints it with the aluminum paint to protect it:
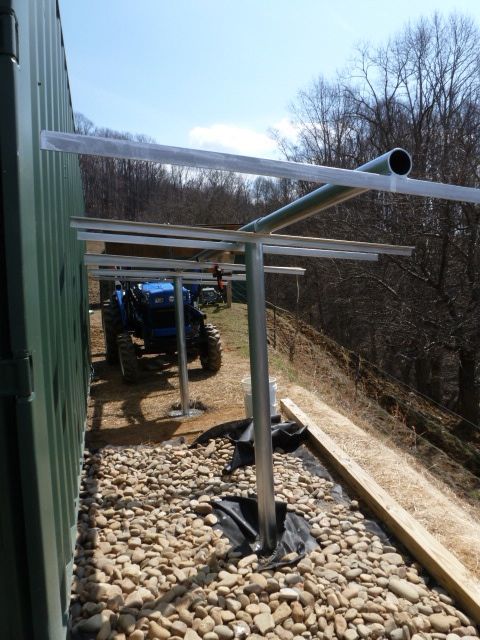

Mike drilled holes into the racks and now they are ready to be tilted and locked into place for the summer and winter sun:


March 18
We used up all 800 pounds of concrete so we needed a new batch. We went to the Farm Supply and got 1200 more pounds. This time we got 60 pound bags instead of 80 pound bags. They are much easier to handle:)
We got those home and loaded all the bags into the back building.
Since the weather is turning bad we start planning our next project. We are going to build a store this year at our other lot. Mike and I were going to make posts and build the whole decking out of wood then we checked the prices for lumber...wow...it has gotten really expensive. We decide to call our old concrete man to see what kind of price he will give us for pouring a slab. The price seems reasonable and Mike and I won’t have to do the labor.
Next we go to Lowe’s. Before a slab gets poured we have to out the plumbing and the drains in. So we go to look at shower options for the bathroom. OK...we have the measurements and we are waiting to meet our concrete guy in the morning.
Next morning...no call and no show from our concrete guy.
The morning after that....again no return call from our concrete guy and Mike has left him numerous messages. Time to move on. Mike called a new local man who we have never used. He came in with a great price and he will start the job weather permitting. His price is $1500.00 less than our old concrete man. Mike told him if he does a good job he can do the cabin slabs for us. Oh did I tell you? We are also planning on building cabins:)
March 21
Snow and Ice today so we couldn’t meet with our new concrete man.
Our first calf was born:)


March 22
We drive to town with the trailer and pick up the base and the back for our new shower. We need this for the measurements for the concrete slab. Lowe’s did not have the sides so we will have to go back for those. Hmm...how do you have the base and the back for a shower but not the sides??
March 23
Mike and I woke up this morning to a racket in the main area of our house. I went out to check it and find out we have something that got stuck in our wood stove pipe. Thankfully the wood stove wasn’t on. Oh great...what is it and how are we going to get it out? I hope it’s not a biting animal, lol.
It’s a bird:


Mike gets a towel and opens the door to grab the bird:


He takes it to the door and lets it go. The bird is fine and flies away:


For the next week or so we have lots of snow and ice.
March 30
We have a new bull calf and he is hanging out with his father:


And the turkeys are out and about:)


That is all we did for the whole month of March, well except for some landscaping and gardening which I will write about this week. Pitiful isn’t it? The weather has just been awful. I know as soon as the weather breaks Mike and I are going to be like crazy people. I just hope we don’t hurt ourselves, lol.
I hope you all enjoyed today’s story. I will write again in Thursday, Saturday and Monday.
Have a great week!!

 I hate re do's...but if it will make our living better than we will do it.
 I can't wait to get some comfy lounge chairs and kick back this year


 I will have to look it up for you