Showing posts with label Lumber. Show all posts

Monday, March 4, 2013

Chapter 133...The Stairs


Off Grid...Chapter 133

Hello everyone.  This is a story I forgot to tell.  I know.  How terrible of me, lol.

Mike and I decided to build a set of stairs going from the back of our house and down the side drive.  The pavement just gets to icy in the winter.

I will share some pictures with you:)

First we start out by digging holes and putting posts into the ground.  We leave one side high for the railing and cut the other side down.   Then we screwed in 2x8's for the sides of the steps.


We also add some weed cloth and landscape rock underneath the steps so we won't have to maintain them.

Two thirds of the way to the top.


Looking up the stairs from the bottom.


The stairs are done, the railing is up and the rocks are in place.

Looking down.


The stairs are painted the same color as the house and the decorative patio blocks are in place.


The rocks underneath.


And the stairs are finished.


These steps will really come in handy when it gets too icy to walk up our drive.   At least we won't bust our bottoms in the winter:)

Next I will tell you about my 2012 garden.

Tuesday, February 26, 2013

Chapter 131...How To Build A Shed Part 3

Off Grid...Chapter 131

Mike and I have been really busy working and also planning new projects Finally I am back to finish our shed story. I am very happy to be able to use a very clean building


Since the shed door is a little high we decide to build a box step using some of of our leftover wood

First we cut four pressure treated boards down.


Then Mike screws the base together.


And the top boards go on.


And now we have an easy step for the doorway.


Next up we have to work on the gaps under the eaves of the shed. We start off by using some old pieces of trim so we can install the J channel. Putting up the old trim.


Mike nailing on the trim.


Mike nailing the J channel.


Now it's time to install the soffit. First we have to cut it down to fit. The soffit comes in ten foot sections. We need to cut it down to about 12 inches for each section. It's a tedious job


Mike cutting the soffit with snips.


Mike starting to install the soffit.


I cut.


While Mike installs.


Now onto the other side. Mike starts off by installing trim. Then he screws in the J channel.


Then the soffits.


Yay...it's the last soffit to go up.


Before we paint we have to make sure the building is completely sealed.

Mike starts filling in any gaps with caulk.


We get that enclosed and now it's time to paint Of course I have to do the trim work. I start first since it takes me longer.


Mike starts rolling the side.


And we are done with the wood part of the shed


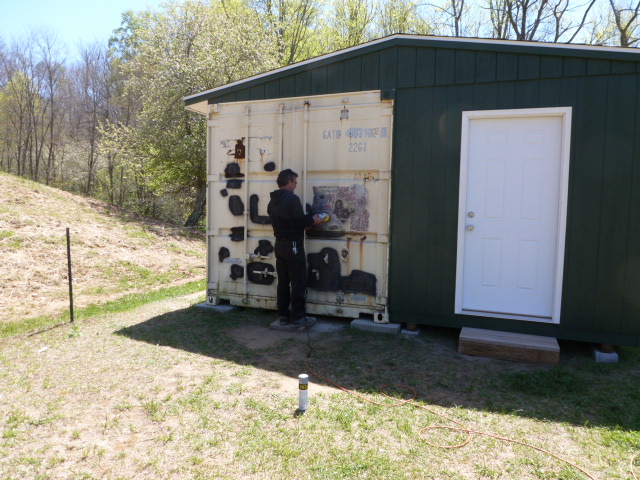
We really have to something about that hideous metal door and metal building


Mike adding a piece of wood to fill in the gap between the back of the truss and the metal building.


Mike installing the fascia.


Now it's the to work on the front metal door. Mike spent a lot of time prepping this.

First he sands it.


Then fills in the dents with filler.


He lets that dry, sands it down and has to fill it again.


We repeat that process until we think it is smooth enough to paint.


Time to paint the door. We are going to use the sprayer this time for a better paint job over the handles and all the nooks and crannies.


Mike prepping the spray painter.


And starting to spray.


And he is almost done. Bye bye ugly door


We still have to finish painting the back side of the metal building but for now we are done with the shed


We went from this.


To this.


And we are very happy with it.


I hope you all enjoyed our shed story. 

Chapter 130...How To Build Mega Shelves

Off Gird...Chapter 130

Now that we have the shed pretty much closed in we can start building the mega shelves on the inside. We are building 2 sets of shelves. They are going to be 8 feet long, 2 feet deep, and 3 shelves high. We are building two of those for a total of 16 feet shelves


Mike screwing the boxes together to hold the shelves.


Mike measuring to cut the backs of the shelves. We are putting a back on the shelves to cover the ugly green metal shipping container.


We get the first shelf unit up.


Mike nailing the back of the first set of shelves.


Next we brace the back wall for the next shelf unit.


We build the shelves and get them installed.


Our shelf units are up


Time to paint the inside of the shed and also the shelves.


Mike mixing the paint.


I start painting the shelves and Mike works on the walls.


The white is almost done Now it's time for the final floor coat.

Mike rolling the paint on after I trimmed the walls and corners.


Woo hoo...the inside of the shed is done. When it dries I can fill it up


OK that caught you up with the inside of the shed. My next story will be about us finishing the outside.


Have a wonderful day!!!


Lisa